
Work with a switch or stack
Open a switch from its closet’s Devices page, read its state, inspect and compare ports, and act on what the read found.
GuideReviewed against the application source on 3 October 2026
Find the switch
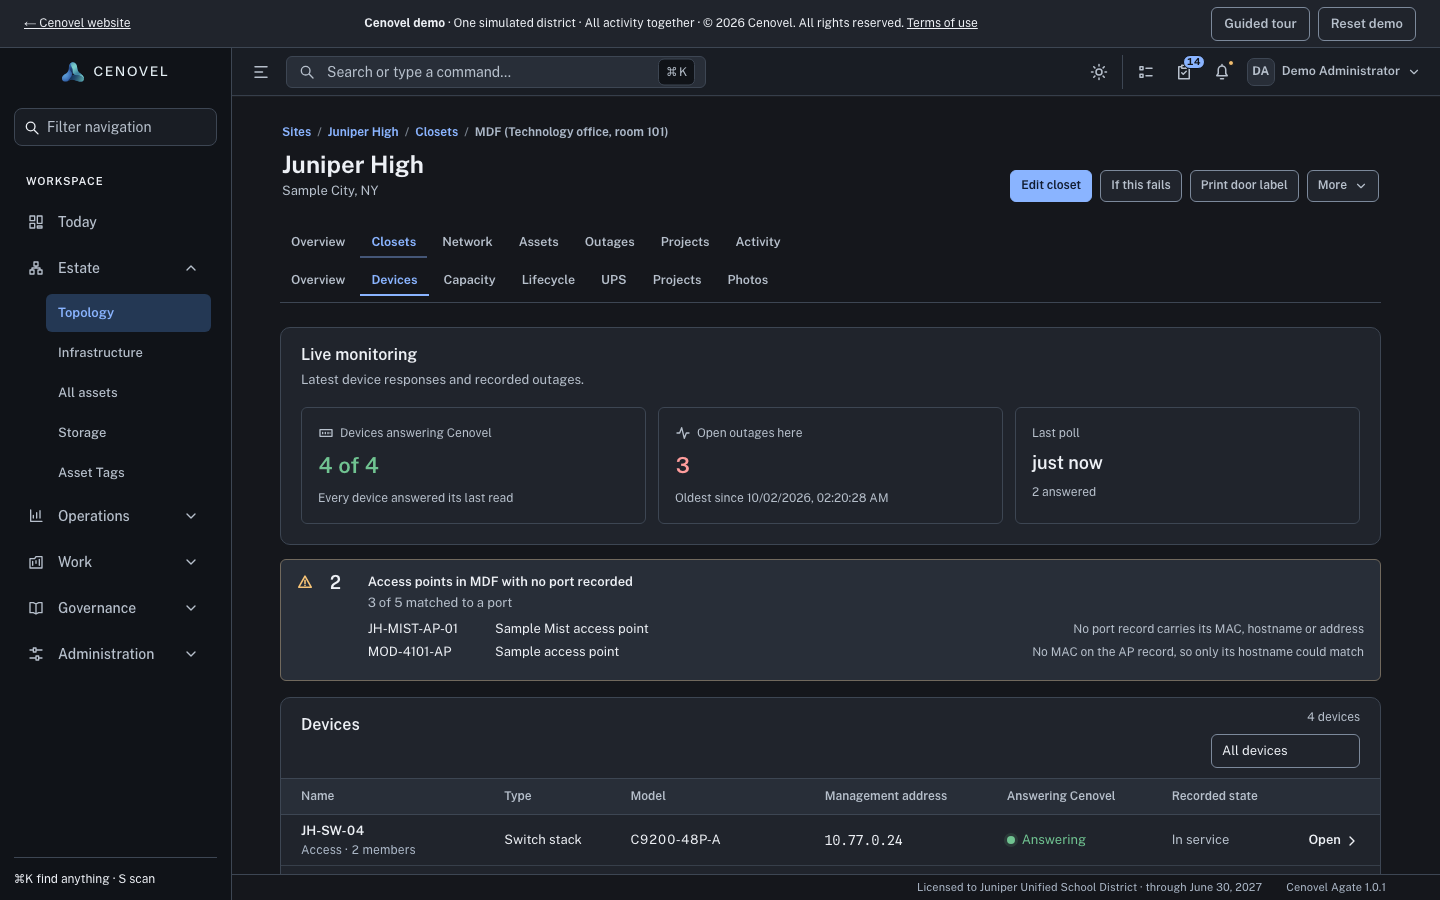
Is this switch healthy, what is on that port, and what do I do if it failed? Open the closet and choose Devices. Switches and servers are in one table, with each device’s name and role, type, model, address, whether it is answering Cenovel, and its recorded state. Use the type filter to show only switches or only servers; search appears when a closet has more than 12 devices. Choose Open on a row. A server opens on its own page; a switch or stack opens the switch page.
Older links to a closet’s Switches or Servers page still work: they open Devices with that type already chosen. A server with no credential reads “without a credential”, never “not answering”.
Read the band
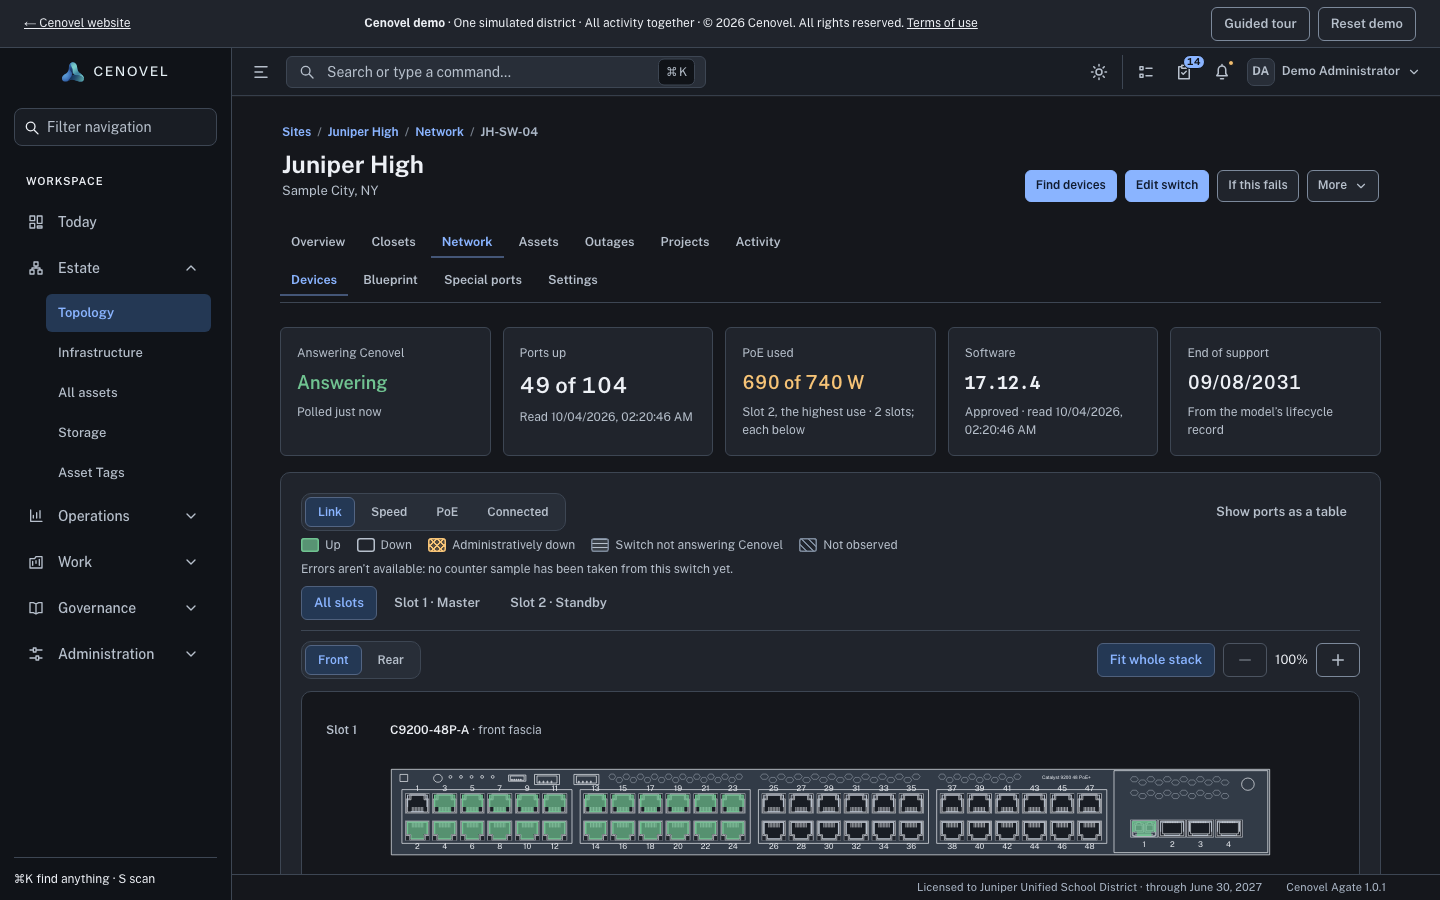
Five cards sit across the top of the switch page:
- Answering Cenovel
- Answering, Not answering, Refused Cenovel or Not checked, with the reason and when it last answered.
- Ports up
- Across the whole switch or stack, with the time of the last port read.
- PoE used
- Against the budget. On a stack it names the member with the highest use and counts members that report none.
- Software
- The version it reports and whether it is approved.
- End of support
- The earliest across the members, from the model’s lifecycle record.
Use the switch card
- Views: Link, Speed, Errors, PoE and Connected color the ports. A view with no data is left out, with one short note saying why; for example, errors need a counter sample, which only SNMP reads give.
- Legend: says what each color means, including Administratively down, Switch not answering Cenovel and Not observed.
- Stack members: show all members, or choose one.
- Front and Rear: switch faces where the model has both. A rear face shows only what is there, so it has no port colors.
- Zoom: fit the whole stack, or zoom in and out.
- Show ports as a table: the same ports as rows, for reading or copying.
The drawing is the catalog model’s layout. Hover over the model name for a note on how it was drawn.
Inspect a port
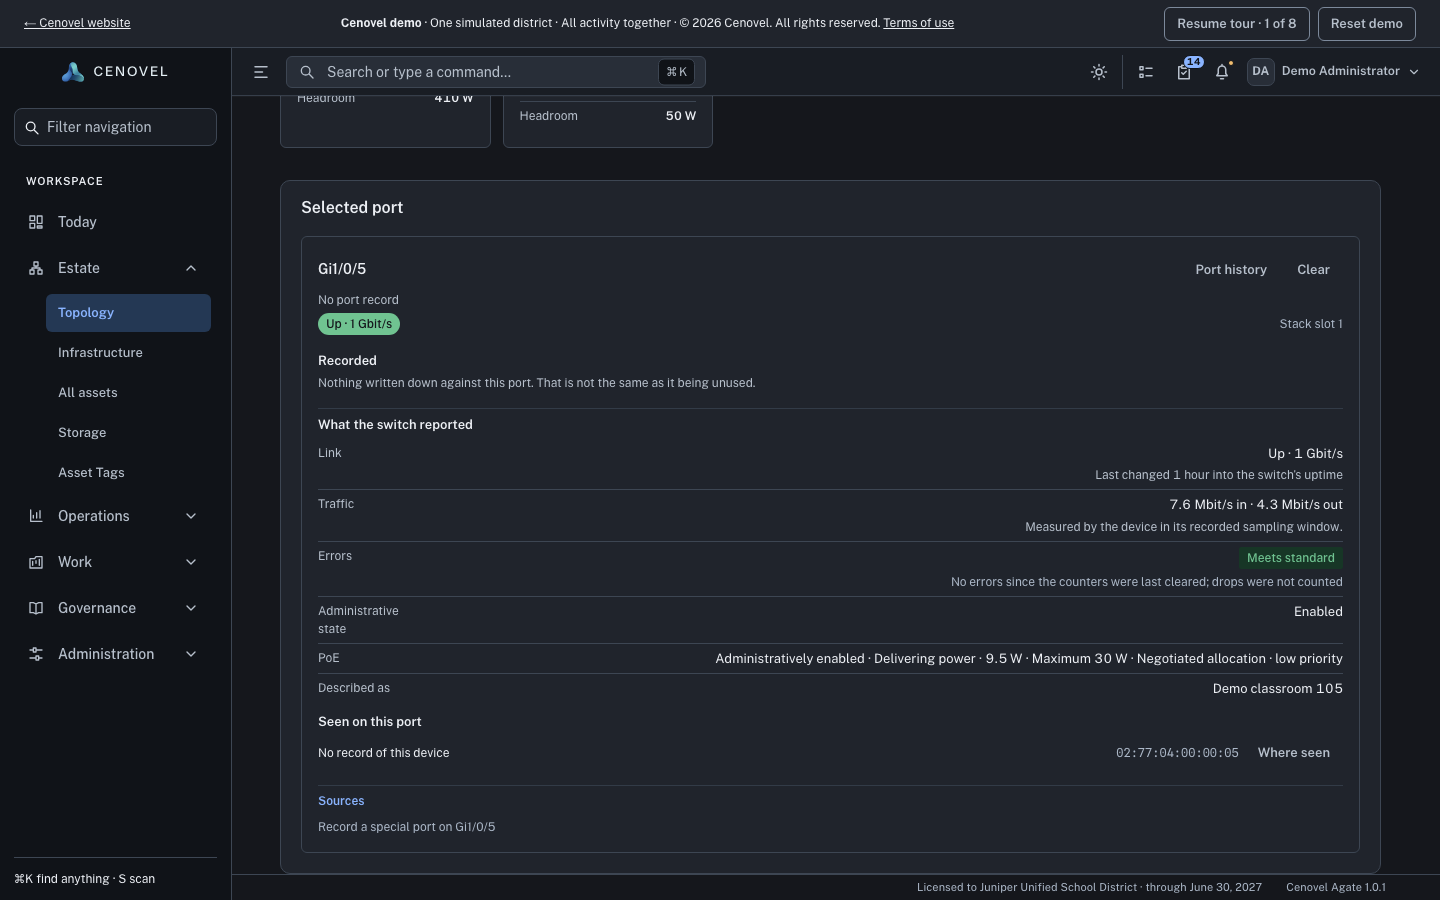
- Select a port on the faceplate. Its card opens in a Selected port panel at the end of the page, after the stack members, so nothing above it moves.
- Read the card: whether it is a recorded port, its state and speed, PoE, what is connected, and when each fact was read. Port history shows where addresses on that port were seen.
- To compare ports, Ctrl-click (⌘-click on a Mac) more ports, or Shift-click for a range. Each has its own card and names its stack member, so identically named ports on two members are never confused.
- Choose Clear on a card to remove it. With the keyboard, focus a port, press Enter to select it and F2 to move to its details.
The three cards and the stack members
- Switch facts
- Role, model (each model in a mixed stack), address, serial or the member count (which links to the member cards), primary member, uptime and recorded state. Ask now reads the switch immediately. Reading details holds the MAC address, uplink module and read times.
- Lifecycle
- End of support and life, warranty, support contract and planned refresh: the same facts as the closet’s Lifecycle page, said once when all members share them and grouped by member when they differ.
- Where it sits
- The closet, the uplink and the neighbors the switch reports, and “Recorded elsewhere” when a member’s record is in another closet. It holds the Replace action.
Below the cards, each stack member has its own card: whether it is in the stack, missing, possibly missing or a different switch, its model and serial, and its own PoE budget and use.
When the read and the record disagree
A Device read differences callout lists what the last read says that the record does not, such as a stack member the read found but nobody recorded. A A different unit answers here prompt means a read found another serial in a known position: choose Confirm replacement to open Replace with the serial filled in, or Not a replacement and say why.
Replace a failed unit
In Where it sits, choose Replace this switch, or Replace a unit in this stack on a stack, then follow Replace a failed switch. Replacement prompts get their own full-width row on the page.
Open the JH-SW-04 stack at Juniper High in the demo and select a port.
Open a switch page in the demoSee also: Sites, closets, stacks and ports · Supported devices
Describes the release being prepared for deployment. Check the behavior on your installed release.